




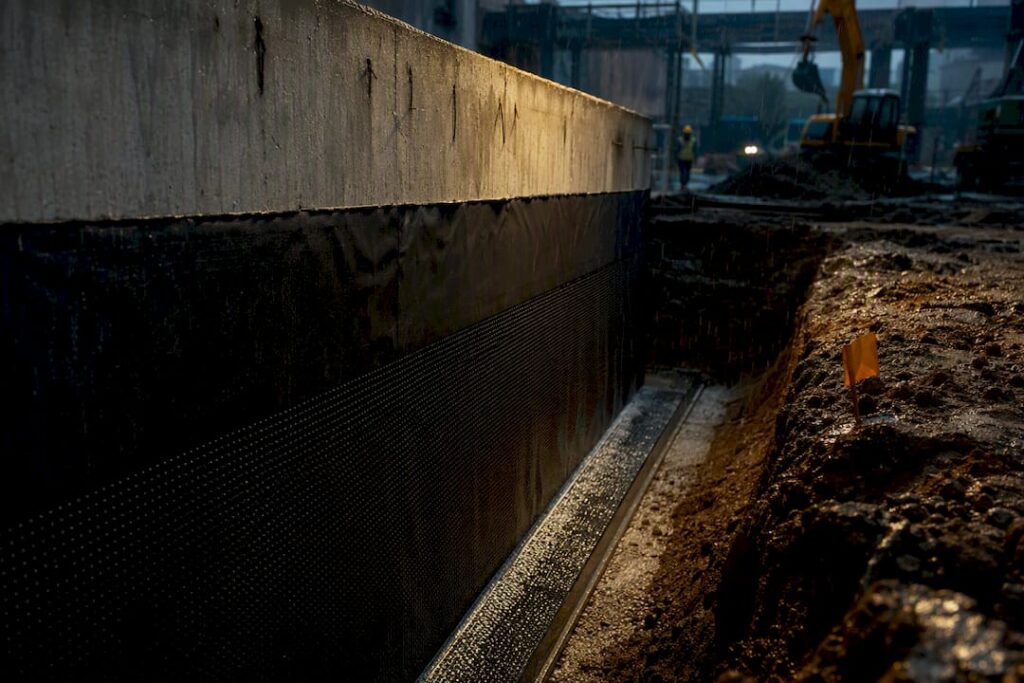
Design every basement to resist the full anticipated head of groundwater, not the water table observed on the day of the site visit. Select a risk-based combination of Type A, B, and C protection matched to the intended use, involve a waterproofing design specialist at concept stage and treat joints, penetrations, and maintainable drainage access as binding contract deliverables rather than construction afterthoughts.
TL;DR:
- Basement waterproofing should be designed to withstand full groundwater head, not just observed water table levels, especially in high-risk or habitable spaces.
- Combining protection types, such as Type A (barrier) and Type C (drainage), is essential for deep or Grade 3 spaces to ensure long-term dryness and structural integrity.
- Site hydrology assessments must include seasonal groundwater data, permeability testing, and surface runoff analysis before finalizing waterproofing strategies.
- Internal drainage systems require properly sized sump pumps with redundancy, remote alarms, and accessible inspection points to ensure reliable water management.
- Penetrations, joints, and interfaces are the leading failure points; locks, waterstops, and accurate detailing are critical to prevent leaks and reduce maintenance issues.
Table of Contents
- What Are the Three Types of Basement Waterproofing Design?
- How Should Site Hydrology Shape the Waterproofing Strategy?
- What Protection Grade Does Your Basement Actually Need?
- Which Joint and Penetration Details Cause Most Waterproofing Failures?
- How Do You Design a Reliable Internal Drainage System?
- What Materials and Substrate Conditions Actually Matter?
- How Do You Verify a Basement Is Actually Watertight?
- What Should a Waterproofing Design Checklist Include?
- A Recurring Mistake Worth Naming
- How Stellar Structures Supports Your Basement Waterproofing Design
- Sources
- FAQ
What Are the Three Types of Basement Waterproofing Design?
Basement waterproofing design rests on three recognized protection categories, and knowing where each one fails is more useful than knowing where it succeeds.
- Type A (barrier protection) relies on an applied membrane or coating outside or inside the structure to physically block water. It performs well against moderate hydrostatic pressure but fails catastrophically at any breach, since the barrier has no backup once punctured.
- Type B (structurally integral protection) uses the concrete structure itself, often with waterproofing admixtures and hydrophilic waterstops at joints, as the primary barrier. It tolerates minor damage better than Type A but depends entirely on concrete quality and joint detailing.
- Type C (drained protection) accepts that some water will enter, then manages it with cavity membranes, floor channels, and pumps. It is forgiving of ground movement but introduces a mechanical dependency: pumps fail, power cuts happen, alarms get ignored.
BS8102-style guidance recommends combining systems for deep basements or Grade 3 habitable spaces, where a single protection type rarely covers every risk. A residential media room forty feet down in a high water table site is exactly where a designer should specify Type A plus Type C as a belt-and-suspenders solution, not a luxury.
How Should Site Hydrology Shape the Waterproofing Strategy?
Before choosing membranes or admixtures, the site itself dictates the strategy. Exterior surface drainage and perimeter drains are consistently more effective at reducing hydrostatic pressure than any internal fix applied after the fact, according to guidance from the University of Minnesota Extension.
A proper hydrology assessment should collect, in order:
- Groundwater level records across seasons, not a single reading.
- Trial pit and permeability data to characterize soil drainage behavior.
- Adjacent stormwater routing, roof runoff paths, and existing site grading.
- Historical flooding or seepage reports for the immediate area.
External controls, including regraded surfaces, extended downpipes, perimeter land drains, and geocomposite drainage sheets against the retaining wall, do the heavy lifting of keeping hydrostatic pressure off the structure before it ever reaches a membrane. New-build projects can integrate these controls at low marginal cost. Retrofits face a harder trade-off: exterior drainage often requires full excavation around the foundation, which is expensive and disruptive, so many retrofit projects lean more heavily on internal Type C systems by necessity rather than preference.
Pro Tip: Order the trial pit investigation before finalizing the retaining wall design, not after. Groundwater behavior discovered mid-construction has derailed more waterproofing budgets than any material choice.
What Protection Grade Does Your Basement Actually Need?
Grade selection is where technical intent meets contractual obligation, and vague specification here is a common source of disputes after handover.
- Grade 1 tolerates some water seepage and damp staining. Appropriate for plant rooms, parking, and spaces with no moisture-sensitive finishes.
- Grade 2 permits minor seepage but no standing water; suited to storage areas and workshops.
- Grade 3 requires a dry environment suitable for habitable use, offices, or residential space, and typically demands combined protection types with mechanical ventilation and drainage.
BS8102-style guidance recommends recording the target grade explicitly in the specification, alongside the assumptions behind it, groundwater level, soil classification, intended finishes, so the contractor and owner both understand what “watertight” means for that specific room. A Grade 3 basement intended for long-term occupancy should carry documented owner maintenance obligations and warranty terms tied to that maintenance being performed. Higher robustness measures, duty and standby pumps, sealed penetration collars, redundant alarms, become justified once occupancy risk or finish sensitivity rises, not as a blanket default across every basement type.
Which Joint and Penetration Details Cause Most Waterproofing Failures?
Design and workmanship, not product selection, are the leading factors behind waterproofing failure, according to NHBC guidance on basement waterproofing. Four detail types account for the overwhelming majority of leaks encountered in practice:
- Construction joints between concrete pours, where cold joints create a direct water path if not treated.
- Slab-to-wall junctions, particularly at the kicker joint, where differential curing and shrinkage open hairline gaps.
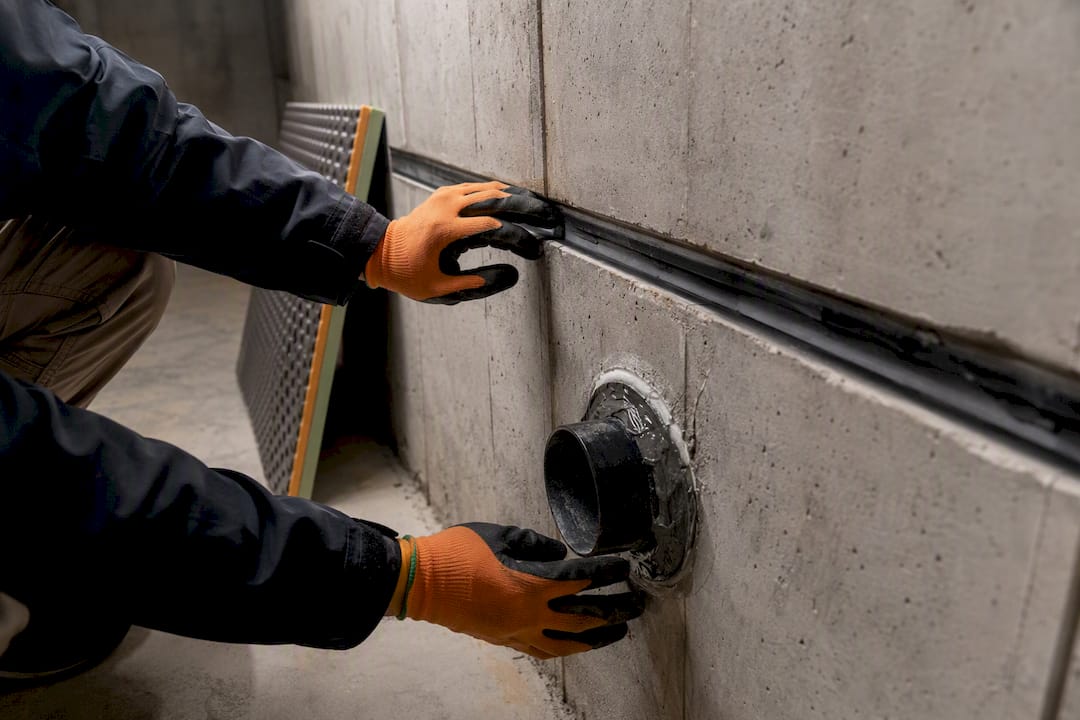
- Pipe and cable penetrations, which are frequently an afterthought added after the waterproofing design is finalized.
- Movement joints, where structural flexibility and watertightness pull in opposite directions.
Specify hydrophilic waterstops at every construction joint, PVC or rubber waterbars at movement joints, and crystalline admixtures where concrete self-sealing capability adds a second line of defense. Injection ports built into the joint at the pour stage, rather than drilled in later, give a maintainable repair path if a joint weeps years after handover.
One structural fact worth building the QA plan around: joint failures traced back to poor detailing, not material defects, are cited repeatedly in NHBC’s own guidance as the leading cause of below-grade leaks. Contract QA should require substrate cleanliness verification, protection board installation before backfill, and written tolerance checks at every joint before the next concrete pour proceeds.
How Do You Design a Reliable Internal Drainage System?
Type C systems collect what they cannot keep out, and the design succeeds or fails on the mechanical system behind the membrane. Best-practice guidance from the Property Care Association treats cavity drain membranes, floor channels, and sump pumps as one integrated system, not three separate line items.
- Cavity drainage membranes create a void behind the wall lining that channels water down to a floor-level drainage system, flexing to accommodate minor structural settlement without cracking like a rigid coating would.
- Sumps should be sized for worst-case inflow, not average conditions, with duty and standby pumps running independently so one pump failure never means one flooded basement.
- Battery backup, audible and remote alarms, and non-return valves on discharge lines are not optional extras on any Grade 3 installation, they are the redundancy that makes the drained approach defensible.
Pro Tip: Route the sump discharge line with an accessible cleanout every ten to fifteen feet, and confirm the discharge point complies with local drainage authority requirements before pouring the slab around it.
Maintainability has to be designed in from day one: sump access covers sized for a technician with equipment, jetting eyes positioned at every drainage channel change of direction, and a documented inspection interval, typically annual at minimum for Grade 3 spaces, recorded in the handover pack.
What Materials and Substrate Conditions Actually Matter?
Material selection means little without disciplined substrate preparation behind it.
- Confirm chemical compatibility between the membrane or coating and the concrete mix, adjacent sealants, and any admixtures already specified.
- Check manufacturer technical approvals against the actual site exposure conditions, not generic marketing claims.
- Specify surface preparation tolerances explicitly: laitance removal, salt contamination treatment, and moisture content limits before any coating or membrane goes down.
- Require documented curing time before backfill or membrane application proceeds.
- Make installer qualification and manufacturer training a contract requirement, and assign protection and repair responsibility in writing before work starts.
Polyurethane coating systems in particular are sensitive to substrate moisture and additive selection; a useful technical reference on polyurethane coating additives covers how additive choice affects cure behavior and chemical resistance in below-grade applications. Getting this wrong rarely shows up at handover. It shows up two winters later, at the worst possible time.
How Do You Verify a Basement Is Actually Watertight?
Verification is not optional, and flood testing remains the standard method for confirming a Type C or combined system performs before occupancy. The Property Care Association’s guidance recommends a defined acceptance procedure rather than an informal walk-through.
- Flood the drainage channels and cavity void to simulate design inflow conditions, and hold the test for a defined duration as specified by the project requirements.
- Verify pump cycling, alarm activation, and discharge flow rates against design specifications, with a named individual signing off the record.
- Inspect floor levels and channel gradients for correct fall toward the sump.
- Document any leak location, remediation action taken, and re-test results before final acceptance.
| Commissioning item | Verification method | Responsible party |
|---|---|---|
| Flood test | hold for a defined duration, visual and level check | Waterproofing specialist |
| Pump cycling | Duty/standby switchover test | Mechanical contractor |
| Alarms and telemetry | Simulated power loss, remote alert check | Commissioning engineer |
| Annual maintenance | Sump clean, membrane inspection | Building owner |
Remote alarm telemetry is worth specifying wherever the basement risk profile is high, unmanned commercial plant rooms and habitable Grade 3 spaces especially, since a silent pump failure at 2 a.m. defeats the entire redundancy strategy.
What Should a Waterproofing Design Checklist Include?
A workable design checklist moves through six stages that mirror how inter-floor leakage eventually compromises structural elements if any single stage is skipped.
- Hydrology: groundwater records, trial pit data, adjacent drainage mapping.
- Specialist design input: a waterproofing designer engaged before concept design is finalized, not after tender.
- Detail review: joints, penetrations, and interfaces coordinated with the structural design of retaining walls and substructure.
- Specification: protection type, grade, and materials recorded with manufacturer approvals attached.
- Commissioning: flood test and pump verification against documented acceptance criteria.
- Maintenance: inspection schedule and access points confirmed before handover.
Where drainage discharge routes cross public infrastructure, coordinating authority submission requirements early avoids late-stage redesign.
A Recurring Mistake Worth Naming
The failures that keep showing up trace back to the same root cause: penetrations added after the waterproofing drawings were finalized. A cable route or floor drain gets sleeved through a membrane that was never detailed for it. The fix is procedural, not technical: lock penetration locations before membrane design, and hand the owner a maintenance schedule they will actually follow.
— Aman
How Stellar Structures Supports Your Basement Waterproofing Design
Getting basement waterproofing right depends on coordination between structural, geotechnical, and waterproofing disciplines from the earliest design stage, and that coordination is where most projects actually lose time and money. The firm offers civil, structural, and geotechnical engineering design, works on substructure and retaining wall interfaces related to waterproofing details, and coordinates authority submissions for drainage discharge or excavation approvals.

If your project involves a below-grade structure, the earliest useful step is a design scoping session covering site hydrology, protection grade, and detailing before drawings lock in. Request a civil engineering consultation to review your basement waterproofing design before it reaches tender stage.
Sources
- Moisture in basements: causes and solutions — University of Minnesota Extension
- Design to BS 8102 — The Basement Information Centre
- Best practice guidance — Type C waterproofing (Property Care Association, June 2022)
FAQ
What Is the Best Waterproofing Method for a Basement?
There is no single best method; the right approach combines protection types based on groundwater conditions and intended use, with exterior drainage prioritized wherever site access allows it.
Which Waterproofing Type Performs Best for Habitable Basements?
Grade 3 habitable basements typically need combined Type A or B protection with Type C drainage as backup, since no single system reliably delivers a fully dry environment on its own.
What Are the Two Main Categories of Basement Waterproofing?
Waterproofing is generally grouped into barrier systems, which block water directly (Types A and B), and drained systems (Type C), which manage water that has already entered.
How Do You Stop Water From Coming Through Basement Walls?
Start with exterior grading and perimeter drainage to reduce hydrostatic pressure, then address wall-specific measures like waterstops at joints, crystalline admixtures, or a cavity drain membrane if seepage persists.
Who Should Design a Basement Waterproofing System?
A waterproofing design specialist should be involved from concept stage, working alongside the structural engineer, since most failures trace back to detailing decisions made before construction even starts.
Recommended
- How Inter-Floor Leakage Can Impact the Structural Integrity of Your Property
- What Happens During a Structural Engineer Inspection? Expert Guide
- Preparing Your Building for Inspection: A Checklist for MCSTs