




Introduction
Shop drawing production for glass railings and staircases for GCBs is one of the most error-prone stages in luxury residential construction – and mistakes here routinely trigger some of the most expensive rework a project can suffer. Unlike standard residential balustrades, Good Class Bungalow projects demand bespoke glass systems with custom geometry, premium materials, and exacting aesthetic standards, which means every drawing error compounds into thousands of dollars in re-fabrication, weeks of delay, and real risk to safety compliance.
This article focuses on the common mistakes in GCB glass railing and staircase shop drawings that lead to costly rework, schedule disruption, and safety concerns. The scope covers new-build and major A&A residential GCBs in Singapore within the context of luxury residential architecture, with particular attention to coordination between the architect, structural engineer, specialist glass fabricator, and main contractor. It is written for GCB owners, main contractors, and project managers working with premium glass balustrades and staircases within Singapore’s regulatory context.
Most costly rework stems from a handful of recurring problems: unverified site conditions, unclear anchorage details, wrong glass specifications, and poor coordination with BCA-approved plans. Required approvals and design calculations should be obtained before glass fabrication – yet on many GCB projects, fabrication begins before these fundamentals are locked down.
By reading this article, you will:
-
Understand what accurate shop drawings for glass railings and staircases must contain and why GCB projects are uniquely sensitive
-
Identify the top mistakes that trigger rework, scrap, and inspection failures on Singapore GCB sites
-
Learn how Stellar Structures structures its shop drawing workflow to avoid these problems
-
Gain practical checks and a pre-fabrication checklist your project team can enforce before any glass is ordered
Understanding Shop Drawings for GCB Glass Railings and Staircases
Shop drawings are fabrication-level detail documents that translate an architect’s or structural engineer’s design intent into precise, buildable reality. In the context of glass balustrades and staircases for luxury landed homes, they specify exact dimensions, glass types, interlayer build-ups, edge treatments, anchorage fixings, tolerances, and the as-installed condition – everything a fabricator needs to produce and a site team needs to install.
They differ fundamentally from design drawings (which communicate architectural or structural intent at a conceptual scale) and from as-built drawings (which record what was actually constructed post-installation). Errors during shop drawing production can lead to costly re-fabrication and installation delays precisely because these documents are the last line of defence before irreversible fabrication begins. Glass cannot be field-cut or modified once tempered or laminated – there is zero tolerance for dimensional error.
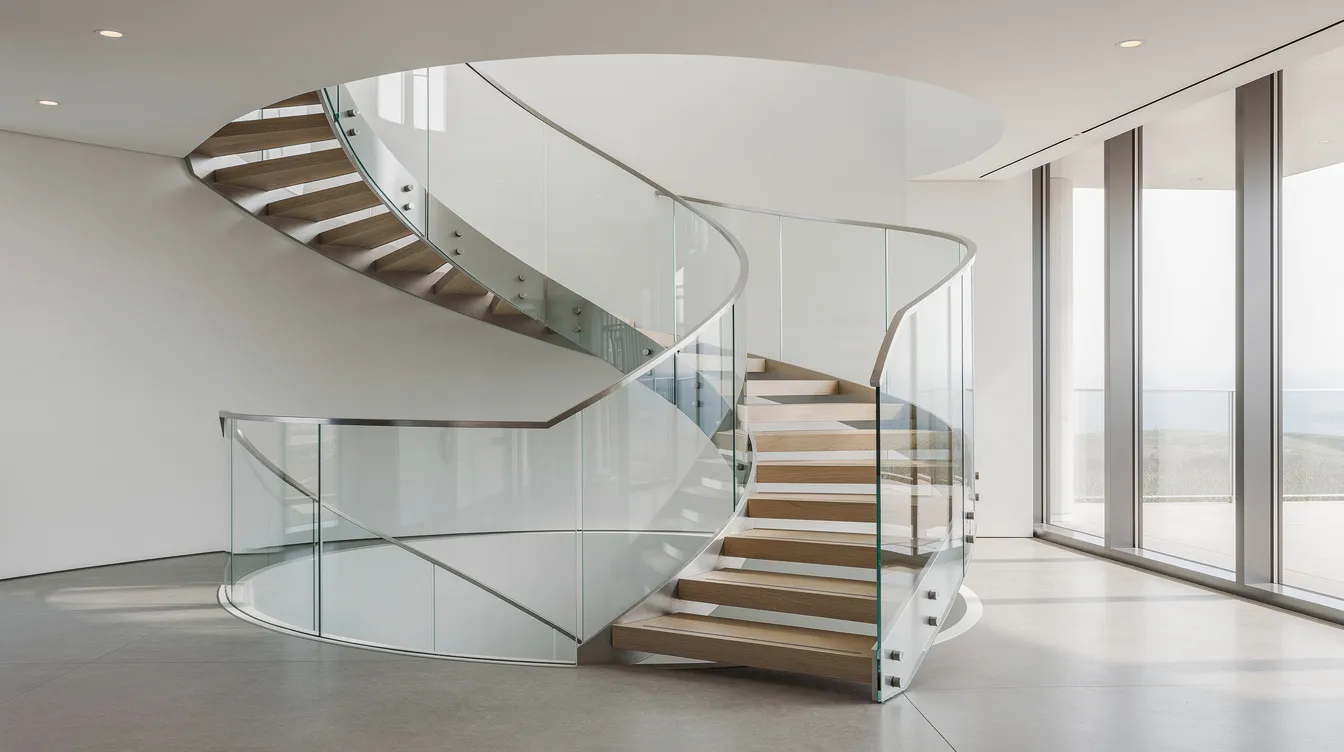
GCB projects accentuate this risk in several ways. Bespoke designs – curved stairs, floating treads, double-volume glass voids – create complex geometry with long lead times for special glass. BCA and SCDF scrutiny is heightened for large residential works. And homeowner expectations for flawless aesthetics mean that even small misalignments or finish compromises are unacceptable.
What Makes Glass Railing and Staircase Shop Drawings and Design Drawings Different from Standard Details
Glass railing and staircase shop drawings for GCBs differ from standard details because they must capture a far wider range of fabrication-critical information. A single drawing sheet may need to define glass thickness, interlayer type (e.g., 13.52 mm heat-strengthened laminated glass with 1.52 mm SGP interlayer, low-iron, polished edges), point-fix brackets, base shoe channel dimensions, handrail profiles, and edge distances to substrate – all with clearly stated allowable tolerances. Shop drawings should include detailed notes on allowable tolerances because over-tolerancing can lead to unnecessary costs and delays, while using outdated tolerances can result in assembly failures.
Unlike generic balcony or stair details, GCB designs often feature floating stairs, curved glass panels, and minimal framing that demand precise fabrication-level information. A curved glass balustrade wrapping a spiral stair – like the kind built for luxury retail or high-end bungalows – requires accurate curve modelling; any error in the radius or fixing positions necessitates a costly custom remake. Drawings must define functional requirements, not just sizes: load capacity, post-breakage performance, edge exposure rating, and deflection limits all need to be specified rather than left for the fabricator to guess.
Integration of structural design checks (deflection calculations, line load capacity, anchor embedment depth) into the detail is essential. These are not add-ons to an “architectural intent” drawing; they are inseparable parts of the shop drawing. Building code compliance for glass railings is strict and requires verification of design load capacities. When these elements are wrong or missing, the rework and replacement cost is severe – a single curved or large glass panel with a premium SGP interlayer can cost thousands of SGD and take 6–8 weeks to re-fabricate.
Key Stakeholders and Handoffs in the Shop Drawing Process
The shop drawing process for GCB glass systems involves multiple stakeholders: the architect or interior designer (design intent and aesthetics), the structural PE (load paths, anchorage, deflection), the glass specialist or fabricator (material selection, production constraints), the main contractor (site coordination, sequencing), and sometimes a separate staircase fabricator (steel stringers, treads). Coordination with other trades minimises the risk of installation conflicts during construction, but achieving this coordination requires disciplined handoffs.
The typical workflow moves from BCA-approved structural and architectural plans to detailed shop drawings, then to QP/PE endorsement (where required), and finally to fabrication and installation. At each handoff, information can be lost or distorted. A common pattern on Singapore GCB projects: an architect issues a design change via WhatsApp sketch or email comment, the fabricator incorporates it without cross-referencing the approved structural plan, and the resulting shop drawing no longer matches the PE-endorsed submission. Missing or unclear datums cause significant communication issues between trades, and delayed deliveries occur due to clarification queries from poor drawings.
Many rework issues arise when these fundamental coordination steps are not translated into precise, versioned, and mutually agreed-upon drawings – which is exactly what the next section examines in detail.
How Poor Shop Drawings Turn into Costly Rework on GCB Projects
When shop drawings contain errors, those errors are literally built into the finished product. Glass is a rigid material that cannot be easily trimmed or modified on-site – you cannot screw on an extension, plane down an edge, or weld a patch. The consequences on GCB projects are therefore severe: extra hacking, re-fabrication of custom glass panels, delays to TOP and CSC, and deeply frustrated homeowners who expected a perfect luxury home.
In Singapore GCBs, each sheet of curved or oversized laminated glass with a premium interlayer like SGP can represent a material cost premium of 20–35% over standard PVB laminate configurations, with the interlayer cost alone running up to 4× that of standard PVB in certain builds. When a drawing mistake forces re-fabrication, the project loses not only the panel cost but another full 6–8 week lead cycle – potentially pushing the entire staircase and railing handover past the TOP deadline.
Misalignment Between Shop Drawings and Approved Structural / Architectural Plans
One of the most damaging mistakes is a mismatch between shop drawings and the BCA-approved architectural or structural plans. This happens when architects or structural engineers make design changes that are not uniformly updated across all drawing sets. The shop drawing follows an earlier revision while the site is built to the latest approved plan – or vice versa.
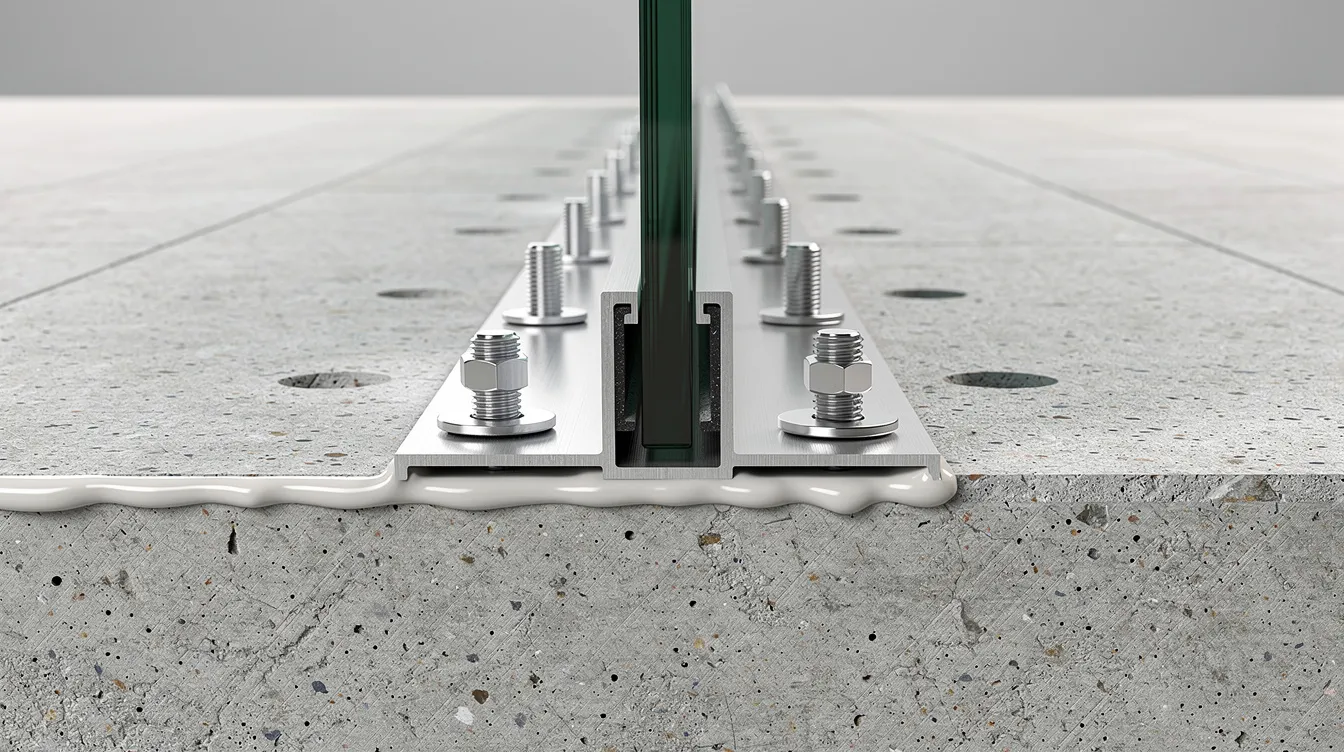
Real-world examples on Singapore GCB projects include: glass balustrade centred on a landing in the shop drawing, but the landing as built is offset by 40–50 mm, causing edge distance failure for anchors. Or the approved plan shows a specific beam position and slab thickness, but the shop drawing references an earlier version where the beam was deeper – and the base shoe anchor embedment now lacks sufficient substrate. This kind of design coordination challenge is especially dangerous when unapproved “design tweaks” by a fabricator or contractor trigger compliance issues during authority inspections.
Key risks include:
-
Drilling into post-tensioned slabs at positions not cleared by the structural PE, risking tendon damage
-
Insufficient anchor embedment because actual slab depth differs from what the drawing assumed
-
Non-compliance with guard height criteria when built floor levels diverge from the drawing’s reference
Inaccurate Site Measurements and Level Checks
Relying solely on design dimensions instead of actual site measurements is a pervasive problem. Sloping terraces, raking staircases, and walls that are not perfectly plumb all produce discrepancies between paper and reality. Failing to verify site dimensions can cause custom glass panels to be misaligned – panels fabricated to nominal dimensions arrive on-site with uneven gaps, forced fitting, or simply don’t fit between posts.
The cumulative impact is significant. Shop drawings must account for cumulative dimension checks to prevent job site conflicts. On a curved staircase where riser heights vary by even 3–5 mm from cast to cast, a glass panel drawn to uniform riser assumptions will produce a top edge that is visibly not parallel to the handrail or soffit. Field measurement and verification processes are critical in preventing costly errors of this kind.
The rework is painful: on-site grinding (which risks damaging laminated glass edges), ordering entirely new panels (with another 6–8 week wait), or re-casting small plinths to bring levels into line – all of which compromise aesthetics on a home where every detail matters.
Incorrect or Incomplete Specification of Glass and Fixings
Specifying the wrong glass type is a mistake that can invalidate an entire installation. Common errors include specifying tempered (toughened) glass where laminated safety glass is required for fall protection, omitting the interlayer type, or underestimating the glass thickness needed for the panel size and load conditions. Railing and staircase designs must follow local regulatory frameworks for safety and performance standards – under Singapore’s Building Control Act (Approved Document H), barriers must use laminated or heat-strengthened safety glass capable of withstanding the design load, and any glass balustrade with a vertical drop of 1.0 m or more must reach at least 1.0 m in height from finished floor level.
Fixing errors are equally problematic. Wrong stainless steel grades for coastal GCBs lead to corrosion; under-designed base shoe anchors fail structural checks; missing tolerance slots mean temperatures can cause glass to expand and contract against rigid fixings, resulting in cracked panels or failed sealant joints. Poor drawings can lead to rejected parts and scrap – and one rejected lot can damage customer trust significantly, especially when the homeowner is already deep into a multi-million-dollar build.
These recurring patterns point to the need for a more disciplined, step-by-step shop drawing process – one that catches errors before they become fabricated mistakes.
Stellar Structures’ Practical Framework for Reliable Glass Railing and Staircase Shop Drawings
Stellar Structures approaches shop drawing production as an end-to-end engineering and design consultancy, treating each GCB project’s glass railing and staircase package as a coordination-intensive system rather than a standalone detail exercise. Effective project management includes ensuring structural compliance throughout the construction process – and that compliance starts in the drawing stage, not on site.
This section outlines a repeatable process that GCB projects can adopt or ask their consultants to follow. The goal is to plan ahead, catch errors early, and ensure that every drawing released for fabrication has been verified, coordinated, and signed off by the right people.
Step-by-Step Shop Drawing Workflow to Plan Ahead for GCB Glass Systems
Apply this workflow after structural plans are approved and before any glass is ordered:
-
Site verification survey – Deploy measured surveys of all staircase flights, balcony edges, slab levels, and upstands as built (after slab cast or structural near-completion). Use laser levels, 3D scans, or point clouds for complex geometry such as spiral stairs. Document with date-stamped photos; record actual floor levels plus anticipated tile finish, screed, and waterproofing build-up.
-
Verify stair pitch angles, riser-by-riser dimensions, and wall plumb at every flight
-
Confirm slab type (conventional RC vs. post-tensioned) and rebar layout at anchor zones
-
-
Coordination meeting with architect/ID and all relevant trades – Collate architectural, structural, interior finishes, waterproofing, and façade requirements. Hold a joint meeting involving architect, structural PE, glass specialist, main contractor, and waterproofing and finishes contractors.
-
Agree on finish build-up heights, waterproofing upturn positions, and base shoe installation sequence
-
Confirm any design changes since last approved revision
-
-
Preliminary shop drawing mark-up – Prepare glass panel layout, thickness, interlayer type, anchorage and fixing details, base shoe or channel sections, handrail profiles, edge finishing, and tolerances. Include plan views and section views at every critical junction.
-
Use varied line weights to enhance drawing depth and ensure clarity
-
Plan drawings to improve focus and clarity; review drawings for clarity before releasing them
-
-
Structural PE checks – Structural engineer reviews loadings, anchor embedment capacity, deflection limits, and glass panel strength against design codes (wind loads, live loads, fall protection). Use GD&T standards governed by ASME Y14.5 for clarity in critical dimensions and datums.
-
Ensure glass panel deflection is within allowable limits for the span and interlayer stiffness
-
Avoid unclear datums to prevent assembly failures
-
-
Architect/interior designer review – Verify aesthetic alignment: glass edges, handrail alignment, base line, and panel junctions match design intent. Confirm finish levels and material selections.
-
Check that glass specification matches visual intent (e.g., low-iron for clarity, tinted vs. clear)
-
Confirm consistency between shop drawing and latest approved architectural plans
-
-
Client preview – Present 3D views or rendered visuals to the homeowner showing panel junctions, handrails, transparency, and how the glass system integrates with the staircase and interior space.
-
Address maintenance access and cleaning methods
-
Document any client-requested changes as formal revision items
-
-
Final PE endorsement and issue for fabrication – Secure PE sign-off where required for authority submission. Issue the “Approved for Fabrication” set with clear version numbering, sign-off stamps, and controlled distribution to the fabricator. Ensure the fabrication set matches the latest approved revision of all upstream drawings.
Coordination Matrix: Where Glass Shop Drawings Intersect Other Systems
Use this matrix during coordination meetings to systematically check drawings before sign-off. Each row represents a coordination touchpoint where errors between drawing sets commonly produce rework:
|
Criterion |
Architectural Drawings |
Structural Drawings |
Glass Shop Drawings |
|---|---|---|---|
|
Balcony upstand height vs. base shoe depth |
Finish level and tile build-up shown |
Upstand reinforcement and slab edge detail |
Channel depth, anchor embedment, clearance to waterproofing |
|
Stair nosing vs. glass line |
Nosing profile and tread material |
Stringer positions and landing levels |
Glass panel bottom edge relative to nosing, gap dimensions |
|
Handrail continuity and egress compliance |
Handrail height, profile, and material |
Fixing load capacity at handrail bracket |
Bracket spacing, rail alignment to glass top edge, SCDF egress requirements |
|
Waterproofing interface |
Membrane type and upturn height |
Structural penetration limits |
Base shoe installation sequence, sealant details, drainage path |
|
Guard height at finished floor |
Floor finish schedule and levels |
Slab-to-slab height |
Glass panel height measured from finished floor, including tile thickness |
Failures in coordination can lead to water intrusion and structural damage – particularly at balcony edges where waterproofing, base shoes, and tile finishes converge. This matrix helps every stakeholder verify their own drawing set against the others before anything is fabricated.
Design Reviews and Sign-Off Protocols that Prevent Rework
Structured drawing reviews are one of the highest-value, lowest-cost interventions in any GCB glass project. Stellar Structures conducts internal checks, cross-discipline workshops, and final client walk-throughs as standard practice. The tools matter too: colour-coded mark-ups, cloud-based drawing platforms with version control, and on-screen 3D views help homeowners and designers agree on the final appearance before committing to fabrication.
For GCBs, reviews should explicitly cover child safety (gap sizes, climbable elements), cleaning access (can panels be reached for maintenance?), and long-term durability of glass components – particularly for coastal sites where salt exposure demands SGP interlayers and marine-grade stainless fixings. Inconsistent illumination makes architectural drawings look incorrect, so ensure presentation conditions allow accurate assessment of details.
Even with robust processes, there are specific recurring mistakes that every GCB project team must actively watch for.
Common Mistakes in Shop Drawings for GCB Glass Railings and Staircases – And How to Fix Them
The following are focused, real-world mistakes observed on Singapore GCB projects between 2018 and 2026, along with the practical solutions that prevent them. Each one represents a pattern that has caused significant rework, cost, and delay.
Mistake 1: Shop Drawings Ignore Actual Stair Geometry
On a recent GCB A&A project, stair flights were cast with variable riser heights – deviating by 4–8 mm from the design drawing’s uniform 170 mm assumption. The shop drawing for the glass balustrade panels used the perfect, nominal stair geometry. When the panels arrived on site, the top edges were visibly not parallel to the handrail line, and gaps under the bottom rail were inconsistent – ranging from 12 mm to 28 mm across a single flight.
The on-site symptom is easy to spot but expensive to fix. Glass panels fabricated to wrong assumptions become scrap. Poor drawings can lead to scrap and rework costs that dwarf the original drawing effort.
Solution: Mandate an “as-cast” survey before finalising stair balustrade drawings. Measure riser-by-riser dimensions and stringer angles with a laser level and photo record. Model the glass panels to the verified geometry, not the idealised design. This small investment in field verification eliminates the single most common source of glass balustrade rework.
Mistake 2: No Allowance for Building Movement and Tolerances
Long glass runs across large balconies or double-volume voids need joints and tolerance gaps to accommodate slab deflection under live loads and thermal movement across Singapore’s temperature range. Temperatures can cause glass to expand and contract, necessitating proper gaps in design. When shop drawings show rigid, tight-fit installations with no provision for movement, the consequences are predictable: panels cracking at corners, binding against steel stringers, and silicone joints splitting – allowing water ingress.
Hidden costs arise from unclear tolerances in poor drawings: the panels themselves may survive, but the sealant failure, water damage, and remedial resealing can run into tens of thousands of dollars on a large GCB.
Solution:
-
Include explicit installation tolerances, slotted holes, and expansion joints in shop drawings
-
Coordinate with the structural engineer on predicted slab deflections and thermal movement ranges
-
Specify minimum gap widths at panel edges and between adjacent panels
-
Assembly failures happen even when parts are within tolerance if the tolerance stack-up hasn’t been checked – so verify cumulative tolerances across the full run
Mistake 3: Over-Reliance on Manufacturer Catalogue Details
Copying base shoe or point-fix details directly from an overseas manufacturer’s catalogue and pasting them into a GCB shop drawing is a shortcut that frequently goes wrong. The catalogue detail may have been designed for a standard 200 mm concrete edge beam, but the GCB may have a thin 100 mm upstand or a steel channel stringer where the anchor capacity is entirely different.
This kind of error reveals itself on site when the installer discovers the anchor bolts don’t achieve the required embedment, or the substrate cracks during drilling. The detail looked correct on paper, but it was designed for a different world.
Solution: Require PE calculation notes tied to the specific GCB conditions for every fixing type. Adjust fixing patterns, anchor lengths, and reinforcement plates based on actual substrate surveys. Never assume a catalogue detail is universally applicable – it is a starting point, not a solution.
Mistake 4: Poor Integration of Waterproofing and Finishes
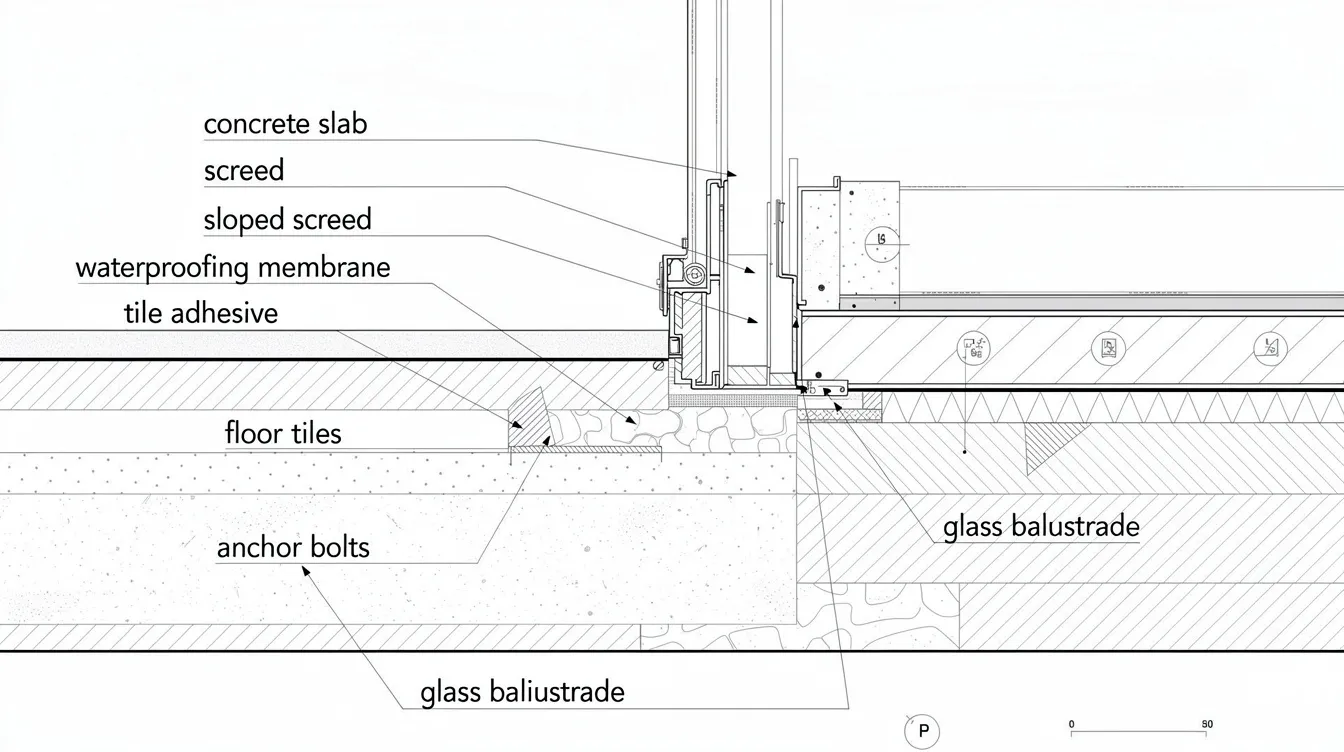
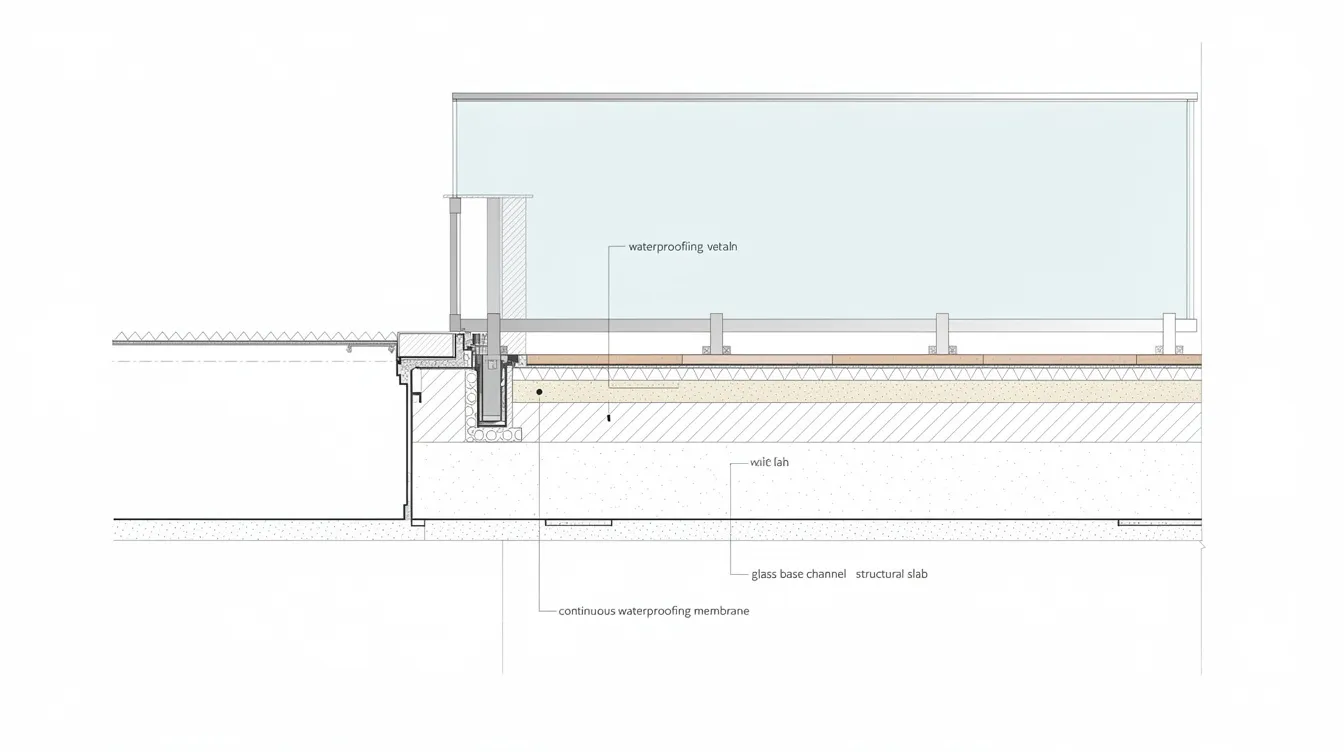
The conflict between waterproofing upturns, tile build-up, and glass base channels is one of the most underestimated coordination issues on GCB projects. Base channels are often installed based on structural floor levels, but the tile build-up (screed + adhesive + tile, often 40–60 mm total) elevates the finished floor. The result: glass panel bottoms end up floating above the finished surface, or – worse – finished tiles must be hacked out to retrofit base shoes that weren’t coordinated with the tiling schedule.
On balcony edges, installing a base channel through a waterproofing membrane without proper sequencing creates leak paths that cause long-term structural damage. These are not theoretical risks – they are among the most common design coordination challenges engineers face on landed residential projects.
Solution: Mandate a joint review between architect, waterproofing specialist, and glass detailer at the shop drawing stage. Produce clear build-up sections showing every layer – membrane, screed, tile, base channel – with step-by-step sequencing notes. The shop drawing should leave no ambiguity about which trade installs first and where each component sits relative to the finished level.
Mistake 5: Non-Compliant Heights and Gaps for Safety
Balustrade heights falling short of the mandatory 1.0 m at finished floor level is a surprisingly common mistake – often because the shop drawing measures height from structural slab level, forgetting the 40–60 mm tile and screed build-up that will be added. Under Singapore’s BCA Approved Document H, any barrier protecting against a drop of 1.0 m or more must be at least 1.0 m high, with no openings that allow a 100 mm diameter sphere to pass through.
Other safety failures include horizontal elements that facilitate climbing (a particular concern where young children are present) and gaps between the glass bottom edge and stair treads that exceed the 100 mm sphere rule. These are typically discovered during TOP or CSC inspections – months after installation – requiring expensive and aesthetically undesirable retrofits such as capping rails or secondary barriers. The National Glass Association provides additional technical guidance on glass guardrail design that can supplement local code requirements.
Solution: Embed clear references to relevant Singapore codes and standards in title blocks and callouts on every sheet. Include a dedicated “safety compliance checklist” page in the shop drawing set, covering:
-
Barrier height measured from finished floor (not structural slab)
-
Gap sizes tested against the 100 mm sphere rule
-
Climbable element assessment
-
Glass type and interlayer verified against fall-protection requirements
Addressing these mistakes upfront, during the drawing stage, is far cheaper than remedial work on a completed luxury home.
Conclusion and Next Steps
For GCBs, precision and coordination in glass railing and staircase shop drawings directly affect safety, cost, and aesthetics. The mistakes outlined in this article – from unverified site geometry to non-compliant safety details – are not rare or exotic. They are common, and they are expensive. But they are also preventable with disciplined processes, clear specifications, and rigorous coordination between every stakeholder involved.
Immediate actions for your project team:
-
Audit current or upcoming GCB projects for the five listed mistakes before confirming any glass order
-
Implement a standardised shop drawing workflow and coordination matrix – adapted from the framework above – to ensure every drawing is verified, reviewed, and signed off before fabrication
-
Engage a PE-backed consultancy like Stellar Structures early for complex glass and stair designs, particularly where curved geometry, premium interlayers, or large-scale additions are involved
Related topics worth exploring include structural design of cantilevered stairs, façade and balustrade inspections for older GCBs, and coordination with fire escape strategies for multi-storey landed homes. If you have an upcoming GCB project with glass railings or staircases in the pipeline, consider having your existing shop drawings reviewed before committing to fabrication – the cost of a thorough review is a fraction of a single re-fabrication cycle.
Additional Resources and Checklists
This section provides practical, non-generic aids that site teams and consultants can use directly on GCB glass railing and staircase projects.
Pre-Fabrication Checklist for GCB Glass Railings and Staircases
Use this checklist before issuing “Approved for Fabrication” on any glass railing or staircase shop drawing set:
- [ ] All critical dimensions verified on-site (including floor-to-floor heights and staircase geometry) with date-stamped records and photos
- [ ] Glass types, thicknesses, and interlayers match structural and safety requirements (e.g., 13.52 mm heat-strengthened laminated with SGP for exposed edges or coastal locations)
- [ ] Balustrade heights and gaps comply with current BCA Approved Document H and SCDF interpretations – measured from finished floor level, not structural slab
- [ ] Anchorage details coordinated with structural drawings, including PT tendon zones and rebar layouts – PE sign-off obtained on anchor capacity
- [ ] Waterproofing and finish build-ups clearly detailed and sequenced – no ambiguity about installation order at base channel or standoff locations
- [ ] Drawings cross-checked against the latest revision number of architectural and structural plans – version numbers match
- [ ] Allowable tolerances stated on all critical dimensions; cumulative tolerance stack-ups verified across full glass runs
- [ ] Slotted holes, expansion joints, and movement gaps specified for long glass runs and thermally exposed locations
- [ ] Edge treatment, heat treatment, and heat-soak testing requirements specified (e.g., heat-soak tested per SS EN 14179 where applicable)
- [ ] Safety compliance checklist page included in drawing set, covering height, gaps, climbing risk, and glass performance
- [ ] Client sign-off on aesthetic presentation (3D views or rendered visuals) documented with revision date
- [ ] Fabricator confirmed receipt of the correct “Approved for Fabrication” revision – no earlier versions in circulation
Visual Examples and Photo References
The following visual aids should be maintained and referenced throughout the shop drawing process:
-
Good vs. bad glass balustrade terminations at stair landings – annotated photos from completed GCB projects (with privacy respected) showing correct alignment versus panels with visible misalignment due to unverified stair geometry. Reference: Mistake 1 above.
-
Proper base shoe coordination with waterproofing and tile build-up – a section detail showing every layer (membrane, screed, tile, base channel) with dimensions and sequencing notes. Reference: Mistake 4 above.
-
Compliant vs. non-compliant glass height over finished floor – close-up photos showing a balustrade that meets the 1.0 m requirement versus one that falls short because tile build-up was omitted from the height calculation. Reference: Mistake 5 above.
Each image should include a short caption explaining what went wrong or right, linked back to the relevant mistake and solution section. These visual references, combined with the checklist above, create a practical toolkit that helps every member of the project team – from designers to installers – produce work that is right the first time.