




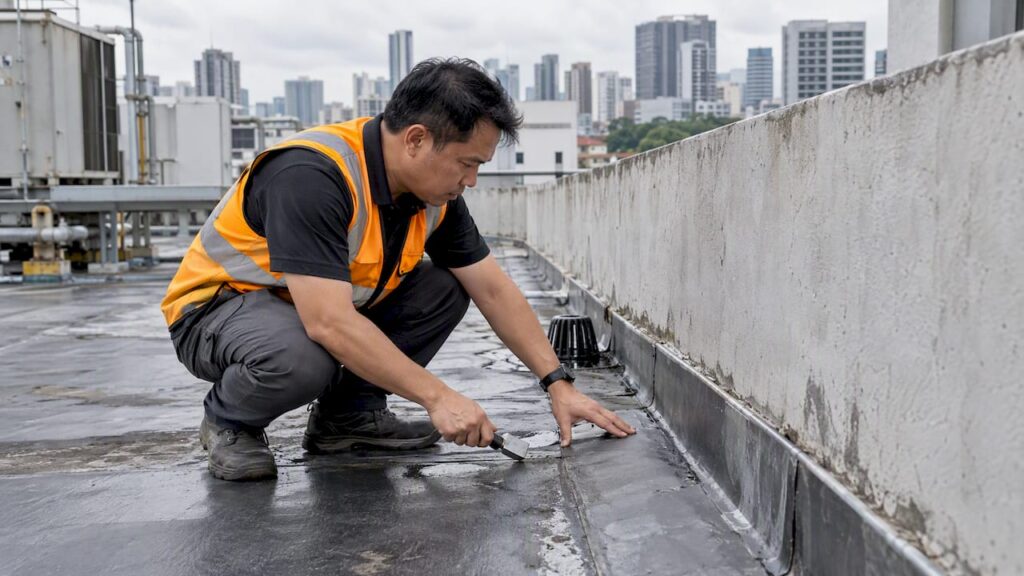
If you see interior ceiling stains, exterior blistering, or standing water on a flat roof, the waterproofing system has likely failed at one or more points. The correct first step is a visual survey paired with a moisture scan, followed by electronic leak detection (ELD) if the moisture is concealed under insulation or overburden. Repair scope typically ranges from a localized patch to full membrane replacement, and the diagnostic result determines which applies.
TL;DR:
- Exterior blistering, ponding water lasting over 48 hours, and elevated moisture readings often precede interior leaks, requiring prompt assessment.
- Poor surface preparation and incorrect membrane selection are the leading causes of early waterproofing failure, especially at penetrations and transitions.
- Non-invasive tests like moisture scans and electrical leak detection are essential before destructive core sampling to accurately locate breaches.
- Repair decisions should depend on diagnostic findings, with full membrane replacement necessary if widespread moisture or aging is evident.
- Regular inspections, drain clearing, and proactive moisture monitoring can significantly reduce long-term waterproofing costs and failures.
Table of Contents
- Signs that your roof waterproofing is failing
- Common causes behind waterproofing system failures
- Diagnosing a roof leak: visual mapping, moisture scans, and ELD
- Repairing a failed roof: from temporary fixes to full replacement
- Preventing roof waterproofing failures: an inspection and maintenance checklist
- What a professional roof assessment should include
- Why early diagnosis saves more than it costs
- How Stellar Structures supports roof waterproofing assessments
- FAQ
- Sources
Signs that your roof waterproofing is failing
Interior and exterior symptoms point to different stages of failure, and reading them correctly prevents wasted repair spend on the wrong location.
Interior signs tend to surface after the membrane has already been compromised for some time, including ceiling stains, peeling paint, and musty odors in enclosed spaces below the roof deck. Exterior signs are often visible before interior damage appears, which makes regular roof-level inspection more valuable than waiting for tenant complaints.
- Blistering or bubbling on membrane surfaces, often a sign of trapped moisture or osmotic pressure building under the coating.
- Ponding water that persists more than 24 to 48 hours after rainfall, which accelerates coating breakdown through biofilm growth, as shown in research on ponding-driven coating erosion.
- Visible cracking, splitting, or granule loss at seams, flashings, and penetrations.
- Discoloration or algae growth concentrated in low spots, a visual cue for chronic ponding.
- Elevated readings on a moisture meter or infrared scan at locations with no obvious surface damage, indicating moisture has already migrated under the membrane.
Blistering and ponding usually call for a scheduled assessment within weeks. Active interior leaks, especially near electrical fixtures or structural elements, need immediate containment and an urgent inspection. The inter-floor leakage risks tied to concealed moisture extend well beyond the roof deck when water tracks into the structure below.
Common causes behind waterproofing system failures
Most waterproofing failures trace back to one of a small number of root causes, and identifying which one applies changes both the repair method and the likelihood of recurrence.
Poor surface preparation is the most frequent cause of early failure. Contaminants, residual laitance, or moisture left on the substrate before membrane application prevent proper adhesion, and the membrane debonds within a few seasons rather than lasting its designed service life. A related issue is selecting the wrong membrane or assembly for the roof type: a system designed for a trafficked deck behaves differently than one intended for an inverted roof with overburden, and substituting one for the other invites premature failure.
Detailing failures at penetrations, flashings, and transitions account for a disproportionate share of leaks relative to the small area they cover, since these are the points where membrane continuity is hardest to maintain. Ponding caused by inadequate slope or blocked drains compounds every other weakness, because standing water both saturates vulnerable seams and feeds the biofilm cycles documented in accelerated ponding-resistance testing.
A less visible mechanism is osmosis: under inverted or covered membrane assemblies, water can migrate through some polyurethane membranes and collect as pressurized blisters, a process described in detail in laboratory investigations of osmotic blistering. This type of failure often appears without any obvious installation defect, which makes it easy to misdiagnose.
- Repeated patching with incompatible materials, which traps moisture rather than removing it.
- Construction moisture left under insulation before the roof was sealed, creating a “closed-wet” condition from day one.
- Thermal movement and cracking at material transitions with different expansion rates.
- Mechanical damage from other trades working on the roof without protection boards.
Diagnosing a roof leak: visual mapping, moisture scans, and ELD
A prioritized diagnostic sequence avoids the two common mistakes: assuming a leak’s source location from the interior stain alone, or jumping straight to destructive testing before non-invasive methods are exhausted.
- Visual mapping. Walk the roof and record ponding areas, visible membrane damage, and penetration conditions against a plan drawing.
- Moisture and infrared scanning. Surface moisture meters and infrared thermography flag areas where water has likely migrated beneath the membrane.
- Electrical impedance (EI) scanning. Following ASTM D7954 practice, impedance scanners detect entrapped moisture in insulated and non-insulated assemblies, though reflective facings and aluminum pigments can affect readings and need accounting for.
- Electronic leak detection (ELD). Governed by ASTM D7877, ELD locates the exact point of a membrane breach using low-voltage scanning, and it requires a conductive substrate or primer to function correctly under conventional assemblies.
- Targeted destructive checks. Where ELD and impedance results are inconclusive, a small core sample confirms the condition of insulation and deck below.
A single flood test uses a large volume of water held over hours and can miss breaches that only leak under wind-driven rain or thermal cycling, while ELD can be repeated across the roof’s life without that risk. This is why proactive leak detection during construction is increasingly specified before a roof is covered, rather than after a leak is already reported. The non-destructive testing methods used in structural evaluation follow a similar logic: confirm the extent of a problem before committing to an invasive repair.
Repairing a failed roof: from temporary fixes to full replacement
The diagnostic findings, not the size of the visible stain, should determine whether a repair is a localized patch, a partial re-cover, or a full membrane replacement.
An active leak above occupied space needs immediate containment, typically temporary sealing and water diversion, while the permanent fix is scheduled. Localized repairs suit isolated breaches confirmed by ELD with no evidence of widespread trapped moisture. Partial replacement becomes necessary when impedance scanning shows moisture spread across a section of insulation, since drying out wet insulation in place is rarely practical. Full re-roofing is warranted when repeated patching has already created a patchwork of incompatible materials, or when the membrane has reached the end of its service life across most of the roof.
- Remove all damaged membrane and saturated insulation before any new material goes down.
- Repair cracks and seams with a compatible system, never by layering a dissimilar product over the old one.
- Rebuild flashing and penetration details to current detailing standards rather than resealing the old profile.
- Protect the finished membrane from foot traffic and other trades until fully cured.
Pro Tip: Never cover wet insulation with a new membrane just to meet a schedule; trapped moisture under a new layer causes faster, harder-to-diagnose failure than the original leak.
Preventing roof waterproofing failures: an inspection and maintenance checklist
A documented maintenance cadence catches small defects before they become membrane-wide failures, and it gives owners a paper trail if a warranty or contractor dispute arises later.
- Inspect the roof visually at least twice a year and after any major storm, checking drains, flashings, and ponding areas.
- Clear drains and scuppers on a fixed schedule rather than only when blockage is reported.
- Log every inspection finding with photos and dates to track whether a defect is stable or worsening.
- Run an ELD or impedance scan before adding overburden such as pavers, planters, or rooftop solar panel installations.
- Consider continuous moisture monitoring on roofs with a history of leaks or high repair cost exposure.
| Maintenance action | Frequency | Why it matters |
|---|---|---|
| Visual inspection | Twice yearly, plus post-storm | Catches surface damage before it spreads |
| Drain and scupper clearing | Scheduled, not reactive | Prevents ponding that accelerates coating failure |
| ELD or impedance scan | Before covering or adding overburden | Confirms membrane integrity before it is concealed |
| Recoat or recover assessment | Per manufacturer service life | Avoids reaching full membrane failure before action |
What a professional roof assessment should include
A roofing contractor can patch a known leak, but a structural or building engineer is the right call when water intrusion has reached insulation at scale, when repairs may affect the roof deck’s structural capacity, or when findings require an authority submission. A proper assessment report goes beyond a verbal opinion.
- A moisture map showing the extent of concealed water, not just visible surface damage.
- Test reports from impedance and ELD scans referencing the applicable ASTM D7877 and D7954 methods.
- Remedial options presented with their relative cost and risk, rather than a single recommendation.
- Guidance on whether findings trigger a BCA or other statutory submission.
A visual survey alone rarely resolves a dispute over cause or responsibility; instrumented data does.
Why early diagnosis saves more than it costs
The owners who avoid expensive re-roofing projects are the ones who commission ELD or impedance testing at the first sign of trouble, not after the ceiling stain spreads. Value engineering that strips out instrumented QA steps to save a small fee at handover routinely costs far more in disputed claims later.
— Aman
How Stellar Structures supports roof waterproofing assessments
We coordinate roof inspections, non-destructive testing, and the statutory submissions that follow when repairs touch the building structure, drawing on engineering experience.

Have your roof drawings, maintenance history, and recent photos ready before requesting an assessment. Explore the full range of services on the Stellar Structures services page to start a conversation about your roof.

FAQ
How do you know if waterproofing has failed?
Persistent interior ceiling stains, exterior blistering, ponding water lasting more than a day or two, and elevated moisture meter readings in areas with no visible damage are the clearest signs. A moisture scan or ELD test confirms whether the membrane has actually been breached.
What are the five most common roofing problems?
Poor surface preparation before membrane installation, incorrect membrane selection for the roof type, weak detailing at penetrations and flashings, ponding from inadequate drainage, and repeated incompatible patching are the most common causes. Each produces different visible symptoms but tends to recur without a proper repair.
What happens if waterproofing is not done correctly?
Water migrates beneath the membrane and into insulation, deck materials, and eventually the structure below, often without visible surface signs until damage is advanced. This can lead to concrete deterioration and spalling, which is far costlier to fix than the original leak.
What is the negative side of waterproofing?
Waterproofing systems that are poorly specified, installed without conductive primers needed for later ELD testing, or covered before testing can trap moisture rather than exclude it. This creates a “closed-wet” condition that is harder and more expensive to diagnose than an open, untested leak.
Sources
- D7877 Standard Guide for Electronic Methods for Detecting and Locating Leaks in Waterproof Membranes
- The silent killer of roofs: water intrusion and the case for proactive leak detection
- Osmosis and the blistering of polyurethane waterproofing membranes
- D7954 Practice for using electrical impedance scanners on roofing systems
- Accelerated testing of ponding water resistance of acrylic roof coatings (biofilm study)
Recommended
- Structural resilience for Singapore’s buildings
- Structural Requirements for Installing Commercial Rooftop Solar Panels in Singapore
- Structural & Façade Inspections in Singapore